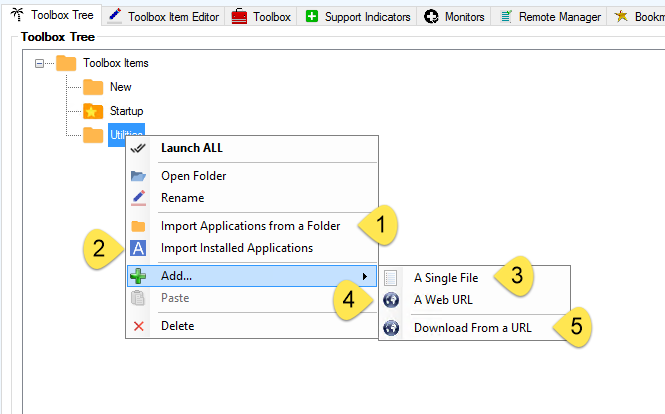
Creating a new Toolbox Item is a simple process. Right-click on the Toolbox Items “root” and specify a new folder.

Name your folder

When your folder is created you can then add items in a variety of ways…

1. Import Applications from a Folder
You will be presented with a file browsing window.

After selecting the folder you wish to Import from press “Use” and specify your search pattern. *.exe is the default.

Including subdirectories is the next option…

Once the scan process has completed you will be offered with the items that meet your search criteria. Select one or more items and press the Select button.

You will now see your imported items.

2. Import Applications from a Folder
You will be presented a confirmation to scan the system for installed applications.

After the scan completes you will see the following dialog window…

3. Add A Single File
A file browser window is opened and you can point to a file or a shortcut to a file.

4. Add A Web URL
A dialog window is opened for you to enter a URL.

You are then prompted to give the URL a name. A default random name is provided.

Enter your “friendly name” for the URL.

If the website has an icon it will be used…

5. Download From a URL
An additional special feature exists where a valid Nox Toolbox Tree Item XML file can be referenced. Visit our Nox Toolbox XML Files help topic for more information.

Finally, you will be asked to name the new item.

